Get in touch with LFADJ Company
Explosion-Proof LED Flood Lights: A Field Engineering Guide to Layout and Commissioning

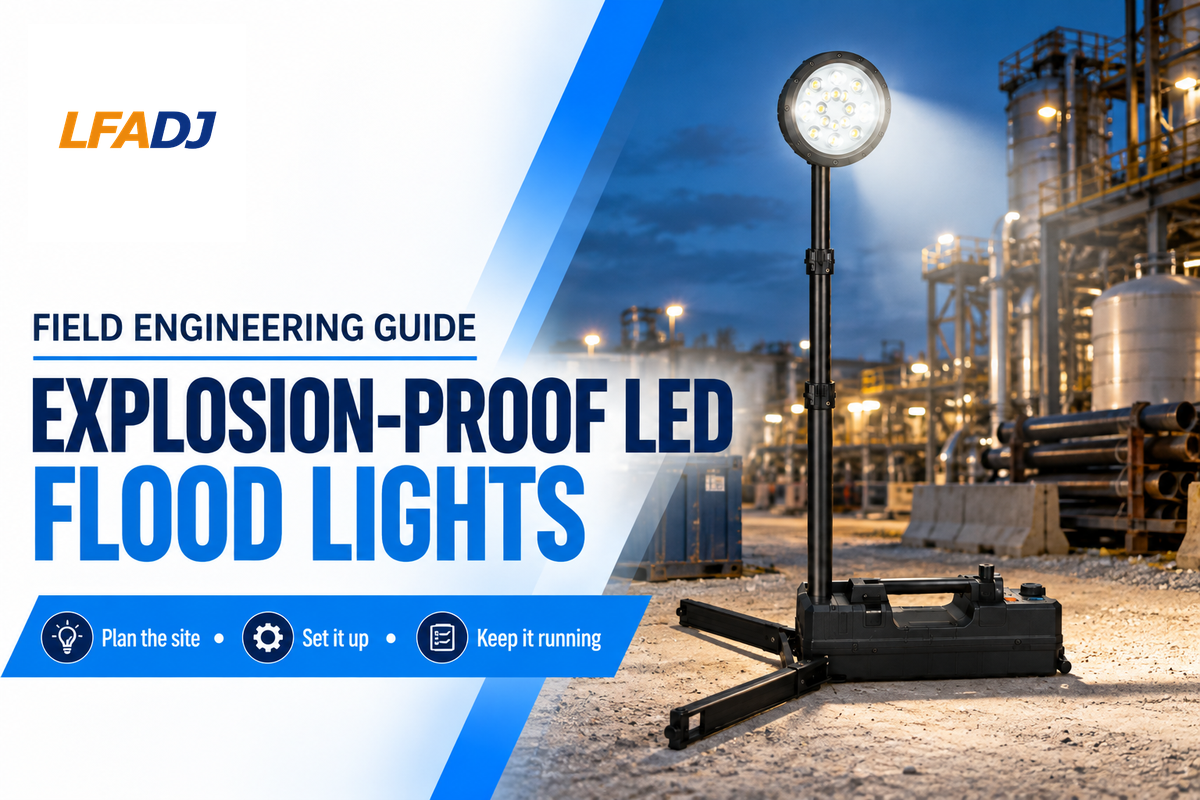
Hazardous-Area Field Engineering Guide
Explosion-Proof LED Flood Lights, including IECEx LED options where that certification scheme applies, need a field plan and a product decision. Build both from the site record, the specific installed model, beam geometry, field obstructions, glare, cable entries, mounting, commissioning evidence, and the ability to inspect the installation later.
An explosion proof light may be a floodlight, a high-bay fixture, an explosion proof linear fixture, or another form. This discussion is limited to the role of LED floodlight in industrial lighting, and isn’t about explosion proof high bay lights, explosion proof LED linear lighting, or LED linear explosion proof lights.
An LED explosion proof flood light is one lighting form, and not a complete lighting design method. Industrial LED systems still require a controlled beam of light for industrial area tasks, the correct mounting, and a documented review of a hazardous area.
For a fixed light for an industrial area, lights are designed around a specific optical and mounting duty. That’s why industrial explosion proof lighting should be reviewed as an LED lighting system, and not as a catalog number in isolation.
This field guide covers that sequence. It doesn’t replace the governing code, an area-classification study, the exact-model certificates and instructions, a photometric design, or review by qualified personnel. It avoids universal spacing, illuminance, torque, temperature, and service-life requirements. Such values are project-specific and based on the equipment selected.
Start With the Area Record, Not the Wattage
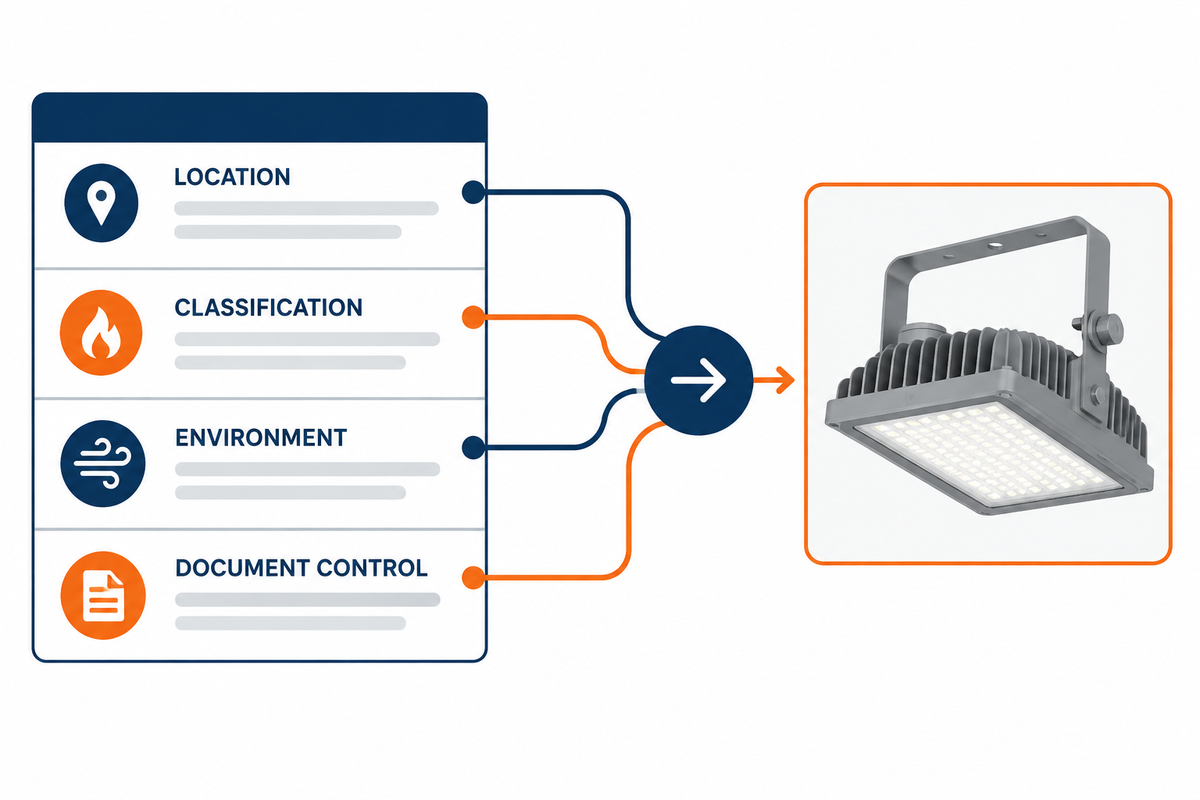
“Explosion proof” isn’t a free-standing promise that applies everywhere. In the United States, OSHA 1910.307 says hazardous locations are classified according to the properties of flammable gases, vapors, liquids, dusts, or fibers and the likelihood that a hazardous concentration is present. It also requires documentation to be available to people authorized to design, install, inspect, maintain, or operate electrical equipment in hazardous areas.
This makes the classification record the first project input for hazardous location lighting. Record the system in use, class or zone, relevant group, temperature requirement, and ambient conditions, and any special conditions. Then, compare the inputs to the complete marking and documentation for the exact variant of the luminaire. OSHA is a U.S. requirement. Other jurisdictions use different routes for equipment approvals. IECEx or ATEX equipment still requires project- and jurisdiction-specific acceptance review rather than assumed acceptance across jurisdictions. The GovInfo record provides an additional source for the federal text.
The same location checks used for indoor rooms are also needed in outdoor areas classified for hazardous materials. The idea is to avoid fire or explosion by matching the complete electrical installation to the documented hazard and not by using a product labeled only in general terms.
A family name isn’t enough, either. One family of hazardous flood lights can have various beam distributions, output packages, control options, mounting arrangements, and temperature ranges and be marked differently. Compare the exact ordered configuration, not a more favorable value shown elsewhere in the family.
Turn the Work Area Into a Lighting Brief
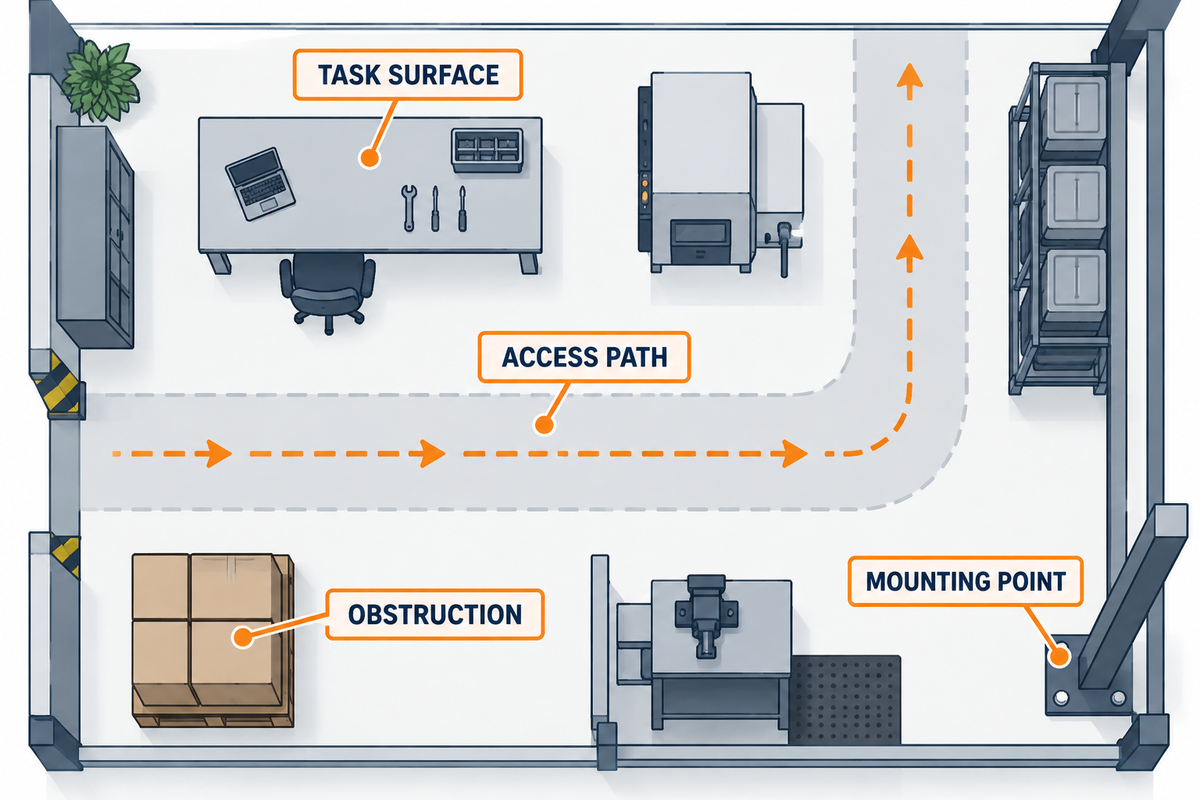
Define where people will stand and what they’ll see before analyzing lighting fixtures. For photometric planning context, see the floodlighting application guide. Relevant task locations include loading points, valve banks, ladders, walkways, vehicle lanes, gauge faces, inspection hatches, and emergency access routes. Set the lighting target for each of these task locations rather than one average value for these lighting applications.
Lights for hazardous locations may serve oil and gas equipment, chemical processing, outdoor areas, or storage areas, but those labels don’t define the task. Work lights and a fixed outdoor flood installation can also create different cable, mounting and inspection responsibilities.
A flood light for hazardous service must support the actual industrial area and task lighting need. The field brief describes that need before a manufacturer chooses optics or a mounting accessory.
Walk the area with operations, maintenance, HSE or QA, and the electrical or project team. Mark mounting surfaces, target planes, obstructions, reflective surfaces, dark surfaces, and moving equipment. Note from where personnel look toward the light. Also identify locations that create a critical blind spot after fixture failure or require temporary access equipment for service.
Layout Input Card
| Field | What to record | Decision owner | Why it changes the plan |
|---|---|---|---|
| Area basis | Classification, group, temperature requirement, ambient range | Engineering / HSE | Defines the approval and environmental envelope |
| Visual task | Walking, reading labels, operating valves, inspecting leaks, vehicle movement | Operations / QA | Defines the useful work plane and sightline |
| Geometry | Mounting height, setback, throw, tilt limits, target width and depth | Lighting designer | Controls beam reach, overlap, spill, and aiming |
| Obstructions | Pipe racks, vessels, handrails, platforms, cable trays, seasonal stock | Plant manager | Creates occlusion and hard shadows |
| Surface context | Reflective cladding, pale floors, dark machinery, wet surfaces | HSE / operations | Changes contrast and glare perception |
| Access | Isolation point, approach route, lift/scaffold need, cleaning reach | Maintenance | Determines whether the design remains serviceable |
| Acceptance basis | Project targets, calculation revision, measurement points, observer tasks | QA / owner | Prevents acceptance from becoming a subjective handover argument |
How to use it: don’t send a vendor only a wattage target. Send verified field inputs and request exact-model photometric evidence for an assessment using the same geometry and acceptance basis.
Match Beam Geometry to Mounting Height and Throw
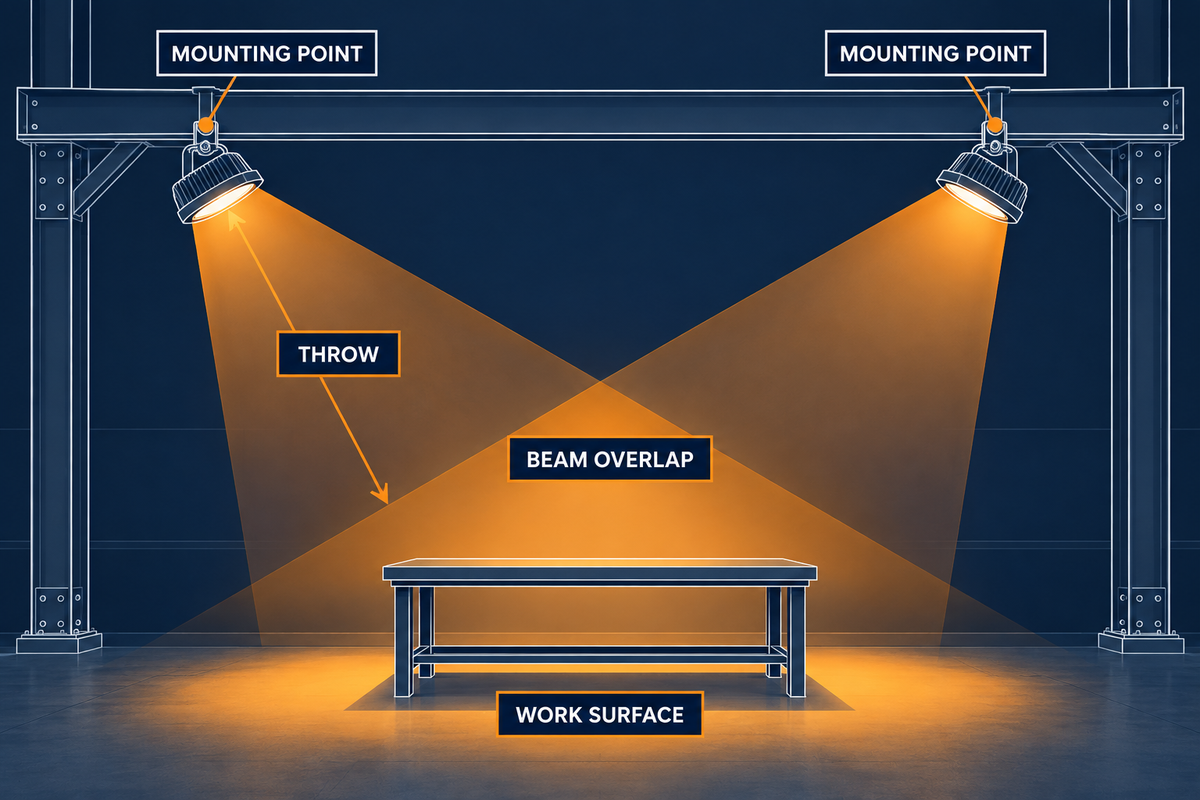
Wattage describes electrical input. Lumens describe total light output. Neither of these factors tells you where the beam of light for industrial work will fall after it leaves the optical system. Various factors including mounting height, horizontal throw, tilt of the optic, beam distribution, overlap, obstructions and the reflectance of the working surface determine the usable result.
A 100W LED label is therefore not a layout. A 100W explosion proof product and a 200W option can use different optics, and a larger number doesn’t remove the need for the same photometric check.
Manufacturer literature illustrates the problem. Dialight’s SafeSite hazardous floodlight family lists narrow, medium, and wide distributions alongside different output packages and exact part numbers. The point isn’t to copy a competitor specification. It’s to show why two products with a similar wattage can create different field conditions.
A narrow distribution may project farther, but exact-model photometric data must be checked for hot spots and steep contrast. A wider distribution may improve overlap, but exact-model photometric data must confirm performance on the working plane. A high tilt angle can push light toward the target while placing the source in the operator’s line of sight. A pipe rack may intercept light that looked adequate on an empty plan.
Use the model’s photometric data to represent the true mounting position and account for obstructions. Check the working plane, vertical surfaces that people may need to read, paths of travel, and the observer position that’s most at risk. If there are changes to the geometry in the field, assess this as a design change, and update the project record accordingly. The aiming and glare section of the Floodlighting guide is additional manufacturer information on aiming and glare and shouldn’t replace the selected model’s documentation.
Use the Shadow-Glare-Aim Triangle
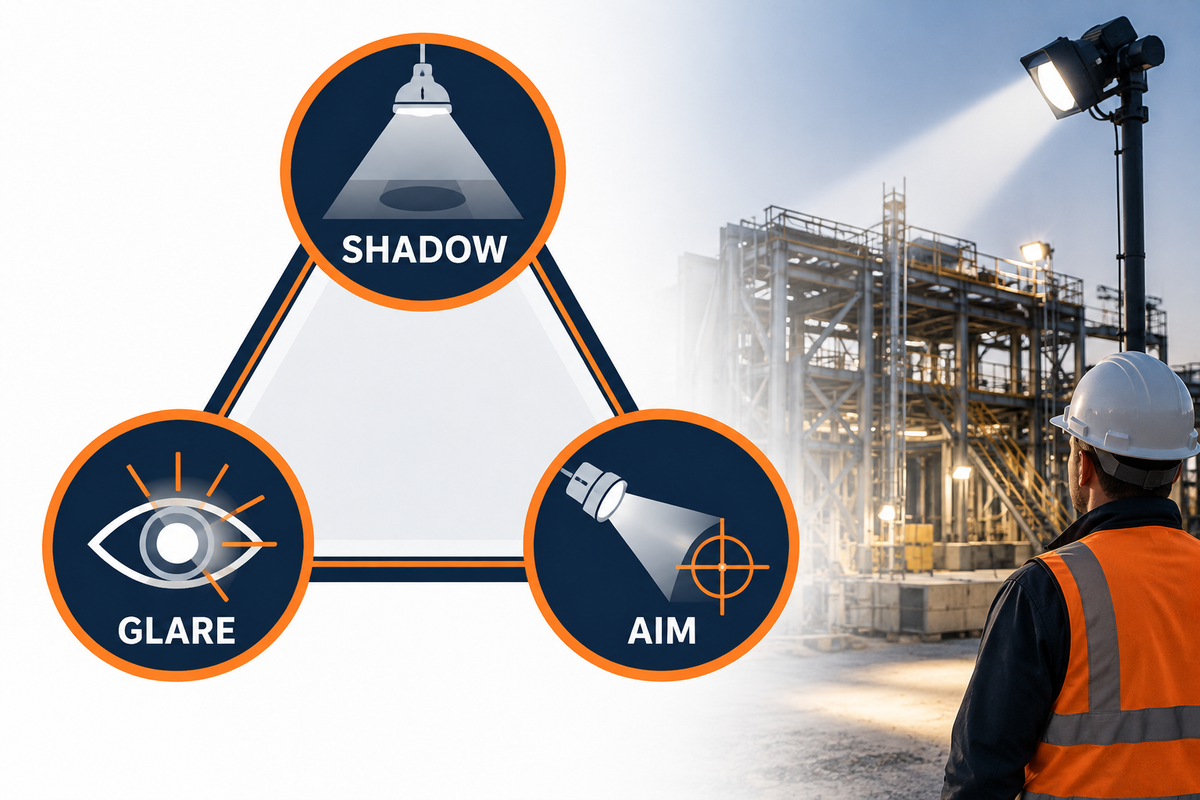
A point measurement may hit the project target, but the area may still be uncomfortable or difficult to use. The floodlighting application guide also illustrates why aiming geometry must be reviewed with glare and coverage. Often, the issue is in one of the three areas: shadow, glare, or aim. Correct one of the three and the others may become worse.
Shadow-Glare-Aim Triangle
| Corner | Field question | Typical evidence | Risk if ignored |
|---|---|---|---|
| Shadow | What becomes hidden when a person, pipe, guard, vehicle, or open door occupies its normal position? | Walkdown photos, observer notes, task simulation, calculation view | Blind zones around controls, steps, leaks, and moving equipment |
| Glare | Can a worker see the source directly or in a wet, metallic, or glazed reflection? | Observer positions, view direction, night observation, complaint log | Loss of contrast even when measured illuminance is high |
| Aim | Does the installed tilt place the beam on the intended plane without excessive spill? | Aim angle/reference, bracket position, beam footprint, before-and-after record | Hot spots, wasted light, boundary spill, and later drift |
Plant-manager use: test the normal operating scene, not an empty commissioning area. QA use: QA should assess lighting at a defined location for a defined task. For procurement, request the beam and mounting options to address the observed gap, not a larger wattage by default.
Account for Heat, Corrosion, Vibration, and Access
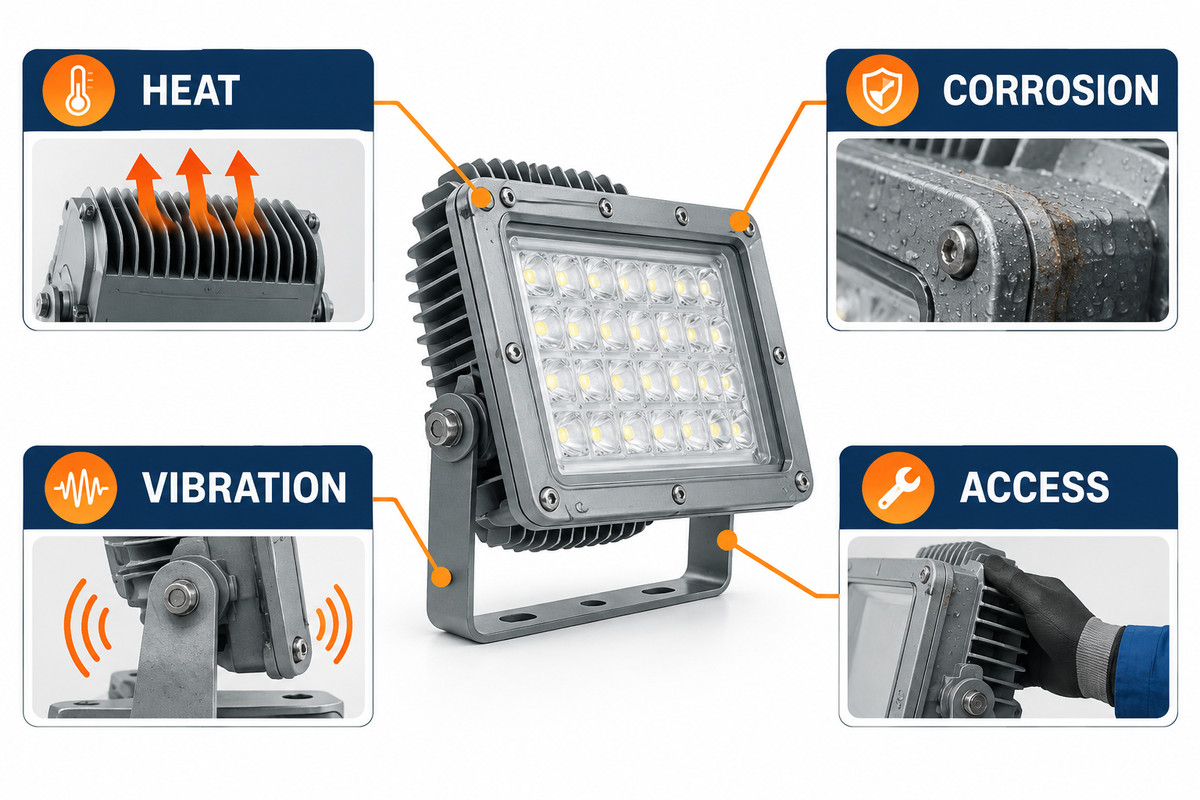
The classified-location match is necessary, but it doesn’t resolve all environmental concerns. There are many factors, such as high temperatures, solar exposure, corrosive chemicals, salt, washdown, dust accumulation, vibration, impact and mounting stability that can impact suitability and life. These factors must be checked against the exact model’s documentation and the project’s conditions in hazardous environments.
Cable entry deserves the same attention as the luminaire body. An Eaton technical paper explains that cable glands maintain the explosion-protection and ingress properties of an enclosure and that requirements differ across jurisdictions and protection systems. This is why a compatible-looking gland or spare plug shouldn’t be accepted from appearance alone.
Field-of-View Walkdown
- Stand at operator and maintenance vantage points and identify reflected and direct glare.
- Place obstructions in their operating positions, and look for concealed steps, labels, valves, gauges, and leakage.
- Trace the cable route and entry arrangement to each enclosure; flag field substitutions for document review.
- Check whether exposure to heat, corrosion, vibration, dirt, water, or impact differs from the design basis.
- Confirm that isolation, approach, cleaning, inspection, fastener access, and safe work positioning are practical.
- Notes should document the finding, accountable owner, due date, and evidence required for closeout.
This turns walkdown findings into assigned actions for operations, HSE, maintenance, QA, and procurement. It provides evidence to support the inspection, but the project’s approved documents and governance process remain controlling.
Review the Installation Before Energization
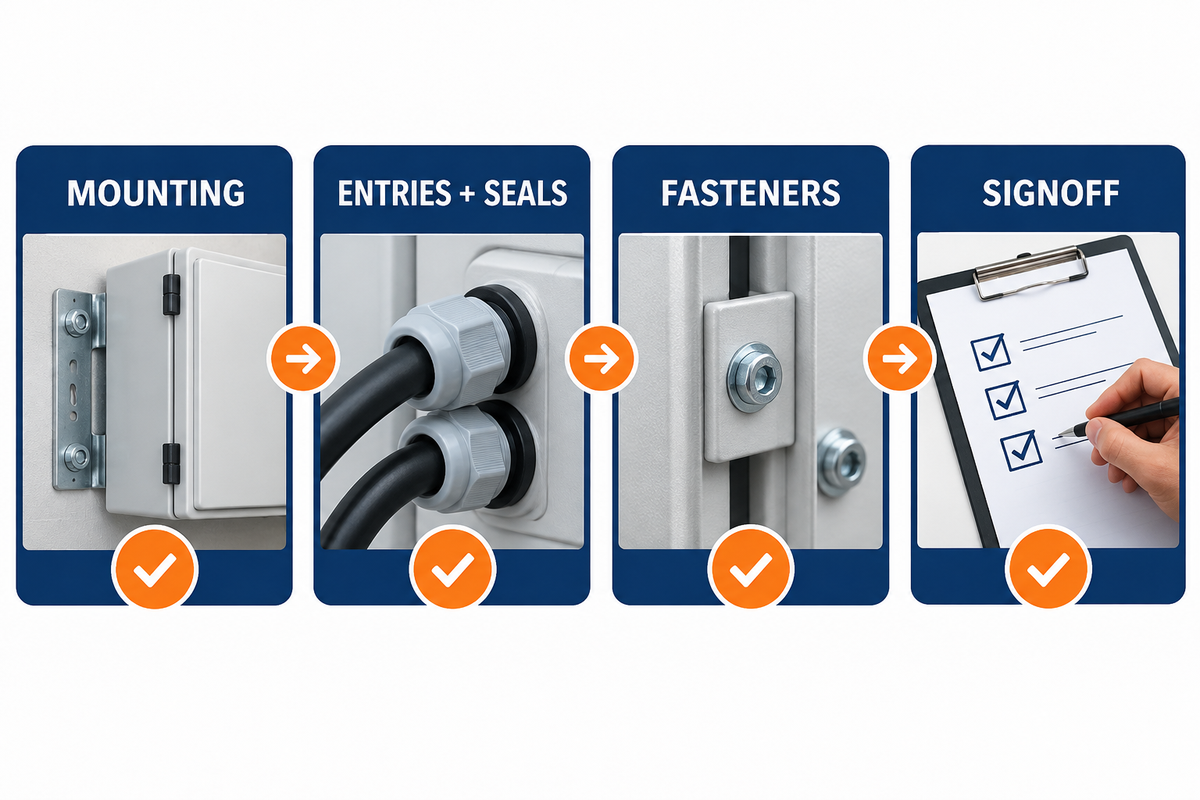
Verify identity against approved records. OSHA 1910.307 provides the U.S. regulatory context for documented classifications and equipment suitability in hazardous locations.
Prior to energization, check the device model and variant; the device’s markings; the mounting bracket’s orientation; and the type and condition of fasteners, cable glands, seals, unused openings, attached accessories, bonding and grounding, and any transport or installation damage. Ensure the installation conforms with the manufacturer’s instructions and applicable code requirements.
Do not turn a blog checklist into a universal acceptance standard. Write the requirement and its evidence—including applicable thread engagement, torque, sealing distance, conductor method, and flamepath treatment—rather than using a number from a different product.
Don’t accept the installation if the classification record isn’t available, markings aren’t legible, exact configuration isn’t traceable to its documentation, an entry device isn’t documented, an opening isn’t closed as required, or visible damage could compromise protection. The project approval process must determine and document the next course of action before work proceeds.
Commission With a Beam-to-Bolt Ledger
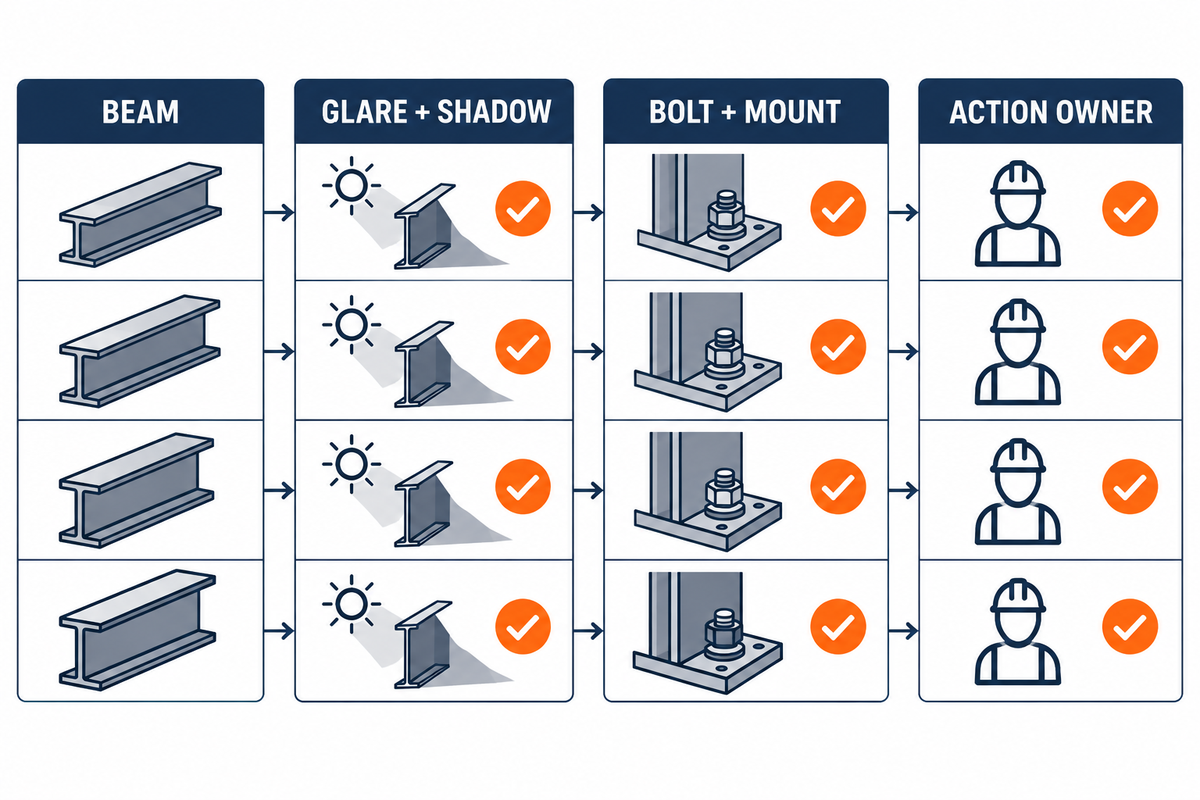
Commissioning joins what the team observes in the field to what the project approves in the office. The Eaton/IEEE cable-gland paper supports retaining cable-entry evidence. For practical project control, this guide recommends one traceable ledger that pairs photometric observations with installation evidence—the beam and the bolt—without treating that format as a code requirement.
Beam-to-Bolt Commissioning Ledger
| Ledger field | Example entry type | Acceptance question |
|---|---|---|
| Location and task | Area ID, work plane, observer position, operating state | Are we checking the intended task under realistic conditions? |
| Fixture identity | Exact model/variant, marking, document revision, asset ID | Does the installed equipment match the approved basis? |
| Mount and aim | Support, orientation, reference angle or bracket position | Can the final aim be reproduced after maintenance? |
| Entry and enclosure | Cable entry, gland/seal/plug evidence, fasteners, visible condition | Are installation details consistent with the applicable documents? |
| Measurement | Defined point, work-plane height, instrument, date, conditions, result | Does the result meet the project-owned criterion? |
| Observation | Glare, shadow, contrast, spill, obstruction, flicker, start behavior | Does the area work for the people and task it serves? |
| Deviation | Finding, risk, owner, due date, corrective action | Is every exception controlled rather than verbally accepted? |
| Closeout | Photo, revised calculation/drawing, test record, approval reference | Is there objective evidence that the issue was closed? |
Finance and owner value: The ledger reduces the cost of rediscovering why a fixture was aimed, changed, or rejected. QA value: It links each finding to a criterion and closure. Maintenance value: It establishes the baseline necessary to identify drift, damage, contamination, and/or unauthorized substitution.
Measurements must follow the points, work plane, instrument method, and criteria defined by the approved project. Record the ambient and operating conditions of the environment which may affect comparison. Link measurements to observations (glare, shadow, sightline obstruction, beam spill, flicker, abnormal start behavior, contamination, and physical instability) that may not be captured by a single reading.
Keep the Layout Maintainable
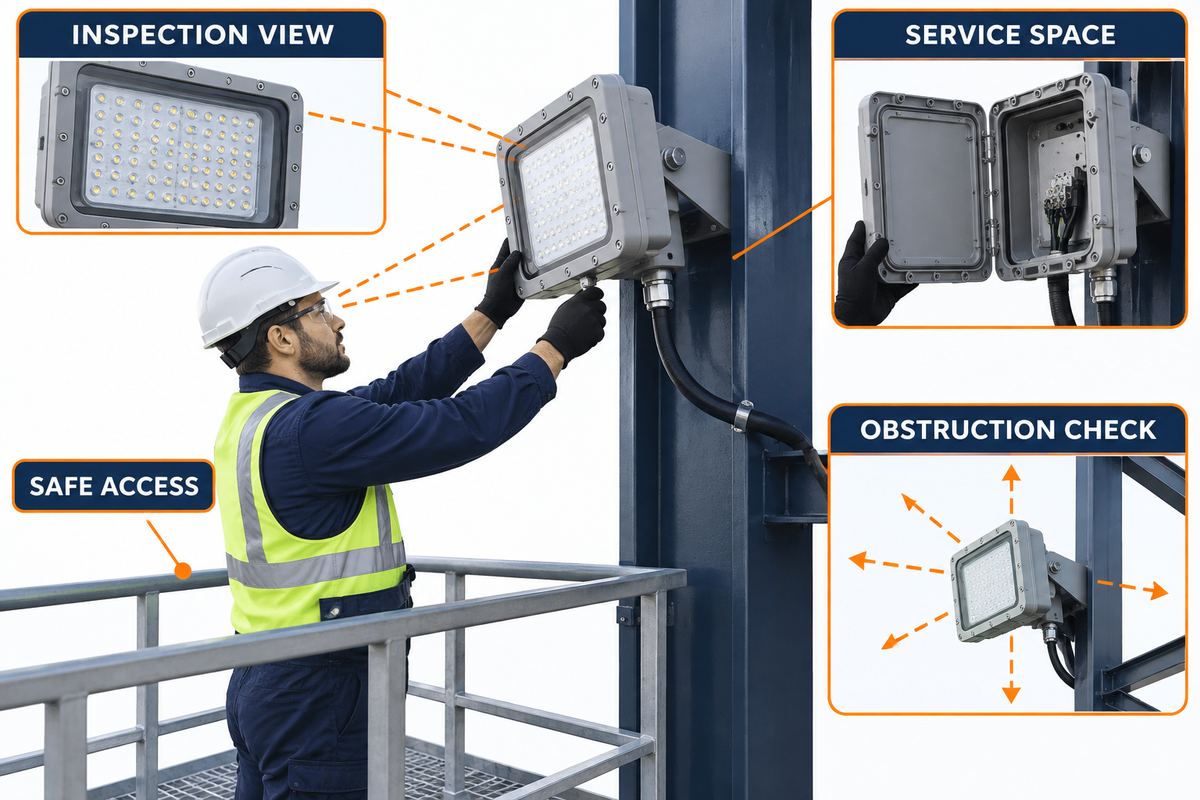
A lifecycle bottleneck occurs when fixtures cannot be reached, isolated, cleaned, inspected, or re-aimed without excessive disruption. Exact-model documents and the manufacturer product record remain the reference for service conditions and configuration. Define the approach route, access equipment, surrounding process controls, and the reference used to confirm original aim.
Use the Commissioning Ledger as a baseline. Model identity, markings, enclosure condition, mounting stability, cable entry, cleanliness, aim, beam footprint, and visibility may be evaluated on future inspections. Any repair, accessory change, relocation, or substitution should be assessed against the approved equipment and project basis prior to acceptance.
The maintenance frequency and pass/fail criteria should be specified by the governing requirements, site risk assessment, manufacturer’s instructions, environmental exposure and operating history. Set the interval for each hazardous area floodlight from those inputs, not from a generic guideline.
Move From Field Plan to Product Selection
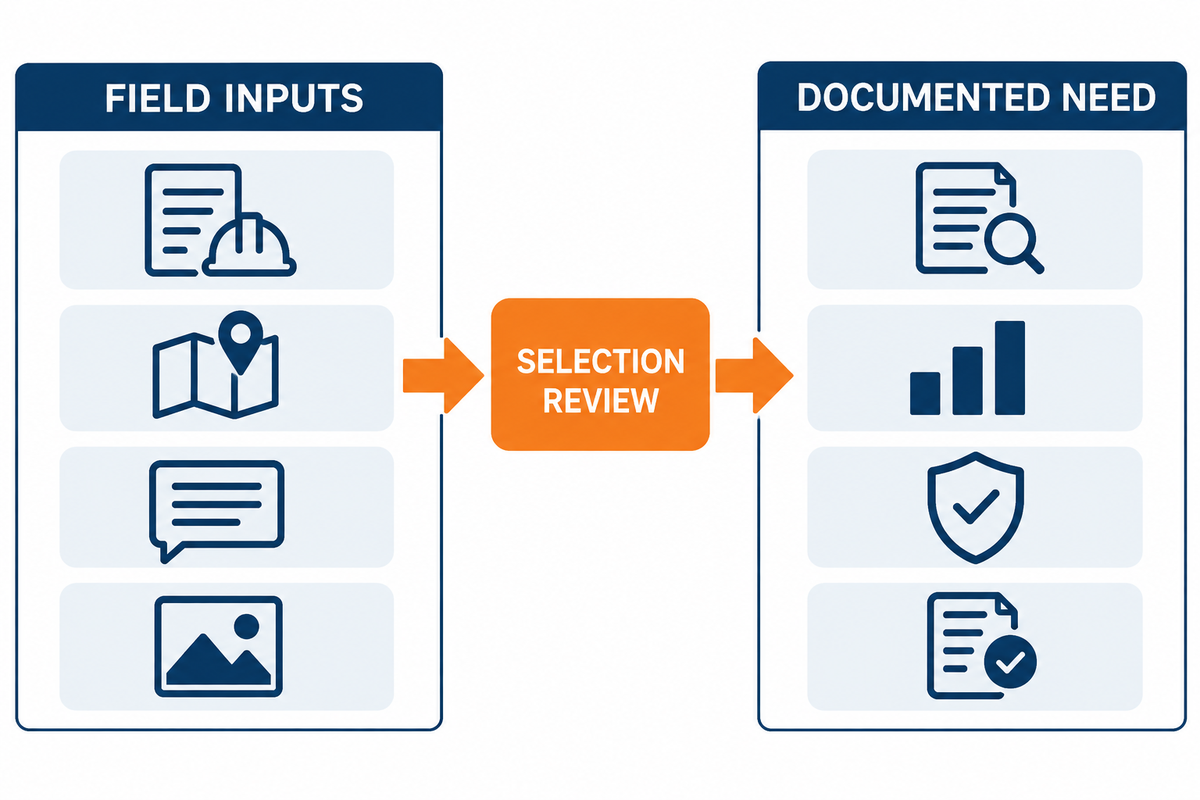
Once the area record, field geometry, visual tasks, environment, access constraints, and acceptance basis are verified, the project is ready for a commercial handoff. Use the LFADJ explosion-proof LED flood lights page to review product options, request exact-model documentation or obtain a quotation. This article deliberately does not repeat that page’s model specifications, certificate-request flow, or RFQ tools.
For context on the company, see About LFADJ. For a wider starting point, see the LFADJ Home page. Specific project questions can be routed through the contact page.
Field-to-Product Handoff
- Provide the classification and environmental basis, not only the words “explosion proof.”
- Provide mounting points, heights, throws, target planes, obstructions, and aiming limits.
- Define the measurement locations, acceptance criteria and basis.
- Request exact-model markings, photometric data, certificates, instructions, and accessory-compatibility evidence.
- Keep commercial details such as quantity, delivery, price, and quotation in the product-page workflow.
Decision Framework: From Area Record to Accepted Installation
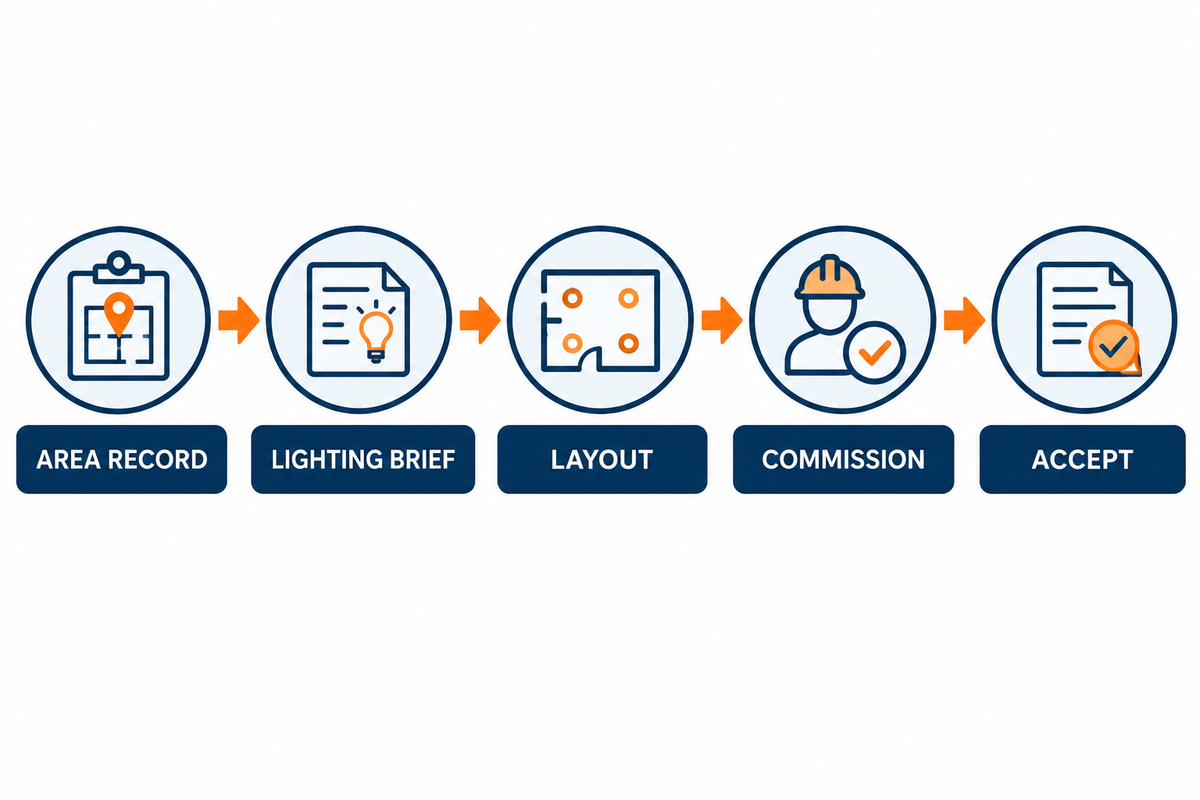
- Confirm the basis: classification, jurisdiction, group, temperature, ambient, and special conditions. Use OSHA 1910.307 only where the U.S. rule applies; the project authority and jurisdiction remain controlling.
- Define the task: work planes, movement routes, observer positions, and effects of low visibility.
- Model the beam: exact model, distribution, height, throw, tilt, overlap, surfaces, and obstructions.
- Review Lifecycle Fit: heat, corrosion, vibration, cable entry, isolation, access, cleaning and inspection.
- Inspect Installation: identity, marking, mounting, entries, seals, fasteners, openings, orientation, and damage.
- Measure and Observe: glare, shadows, sight lines, spill, stability, operation, and project defined points.
- Close deviations: owner, due date, corrective action, and objective evidence.
- Preserve the Baseline: use the ledger for later maintenance, repairs, re-aiming, and change control.
Frequently Asked Questions
Are all LED flood lights explosion proof?
No. LED describes only the light source; hazardous-location suitability requires a separate exact-model and location check. The complete luminaire, in combination with its approved protection and markings, certified conditions of use, and the actual classified location, determines hazardous location suitability. A weather resistant IP rating doesn’t establish hazardous-location approval; check it separately. Compare the area record and governing basis to the exact installed model and its documentation and have the responsible authority resolve and document the uncertainty under the project approval process.
How do I choose a beam angle for an explosion-proof flood light?
Consider the task direction and target area, throw distance and obstructions, surface reflectance, glare, and the limitations of the optics. A narrower distribution may project farther, and a wider distribution may improve overlap; verify hot spots, contrast, and distant-target performance with exact-model photometric data. Use exact-model photometric data, and verify the results of the analysis with measurements and a walkdown.
What should be checked when commissioning hazardous-location flood lighting?
Combine documentary, installation, photometric, and operational evidence. Confirm model identity and markings; assess mounting, cable entries, seals, fasteners, unused openings, orientation, and damage; document aim and measurement locations; observe glare, shadows, and sightlines; and assign each deviation to an owner. Maintain evidence of correction and closure for the maintenance baseline.
Can I use wattage to compare explosion-proof LED flood lights?
Not on its own: wattage describes electrical input and doesn’t tell you where the beam will fall after it leaves the optical system. Other factors such as optical distribution, mounting geometry, surface reflections, glare, and depreciation affect the result. When comparing photometric information for exact models, consider the project geometry rather than considering wattage or lumen claims in a vacuum.
Does this guide replace a hazardous-area lighting design or approval review?
No. It’s a planning and acceptance framework. The governing code, area classification record, project specifications, exact model certifications and instructions, photometric design, and qualified decisions govern the installation. Where there’s a conflict between a general practice and the aforementioned, follow the project specific requirements.
References & Sources
- OSHA 1910.307: Hazardous (classified) locations
- GovInfo: 29 CFR 1910.307 archive
- UL Standards: hazardous-location lighting standard record
- Eaton/IEEE: Cables and Cable Glands for Hazardous Locations
- Current Lighting: floodlighting guide
- Dialight SafeSite LED High Lumen Floodlight technical page
- LFADJ Explosion-Proof LED Flood Lights product page
LFADJ · COMPANY & TECHNICAL CONTEXT
Practical lighting guidance for real project conditions
LFADJ shares product context, application notes, and selection checks to help project teams compare industrial lighting options with the right site details in view.
What LFADJ covers
LFADJ focuses on industrial lighting and tailored lighting solutions for teams planning, specifying, or operating demanding work environments.
- Product context: mobile lighting, light towers, explosion-proof lighting, emergency lighting, and related industrial lighting equipment.
- Project context: application conditions, target illumination, runtime, site constraints, and product configuration questions.
- Decision support: use the information here as a starting point, then confirm final specifications against the actual installation and local requirements.
Industrial lighting
Application guidance
Project enquiries
NEXT STEP
Have a site question?
Send the operating environment, lighting target, expected runtime, and any drawings or photos you have. The existing enquiry form is ready for a focused discussion.
Start an enquiry Or use the LFADJ contact page