
Get in touch with LFADJ Company

By GW · Updated October 2026
Portable LED Work Lights bring illumination to a bench, vehicle or temporary job site. The useful choice makes the actual detail visible while your hands and tools are working. The most useful factors to compare are beam coverage, color, and a reachable mounting position. Then, compare power, protection, and the entire kit.
A lamp can appear impressive across a garage, but a reflection can hide a stamped number. This guide gives a means to evaluate the difference, including a comparison you can do with a representative workpiece.
What Portable LED Work Lights Do
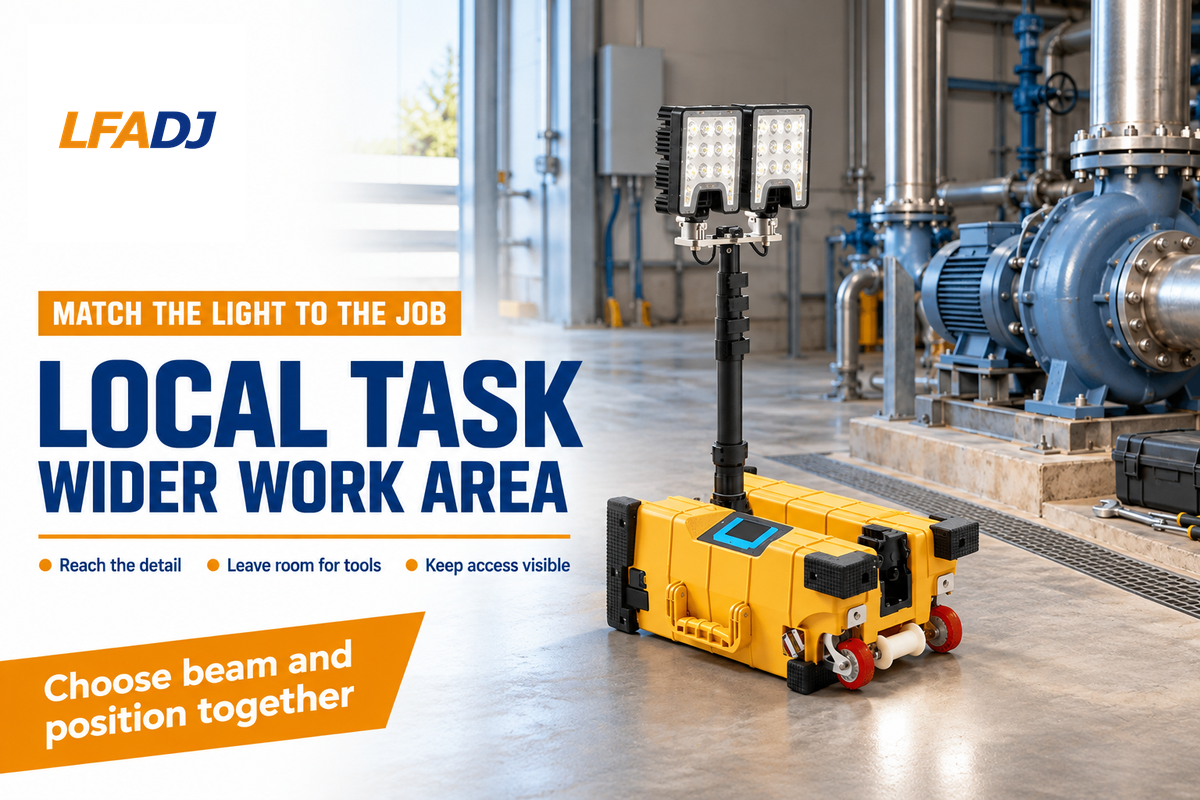
A portable work light offers local task lighting or wider area lighting that’s movable with the job. A handheld inspection lamp reaches a recess; a supported flood light covers a work zone; larger area lights help people move around a shared workspace. These different roles require different beam shapes and positions.
The Canadian Centre for Occupational Health and Safety’s lighting guidance separates general illumination from localized and task lighting. A portable LED lamp supplements room lighting rather than replaces it.
For shop work, consider if you need to see a small fastener, inspect a finish or illuminate the route around equipment. A flashlight follows your hand but occupies it. A hands-free light leaves both hands free, as long as its support holds the beam where you need it. Working at night may require a local task light and access lighting.
Lumens, Lux and Beam Coverage
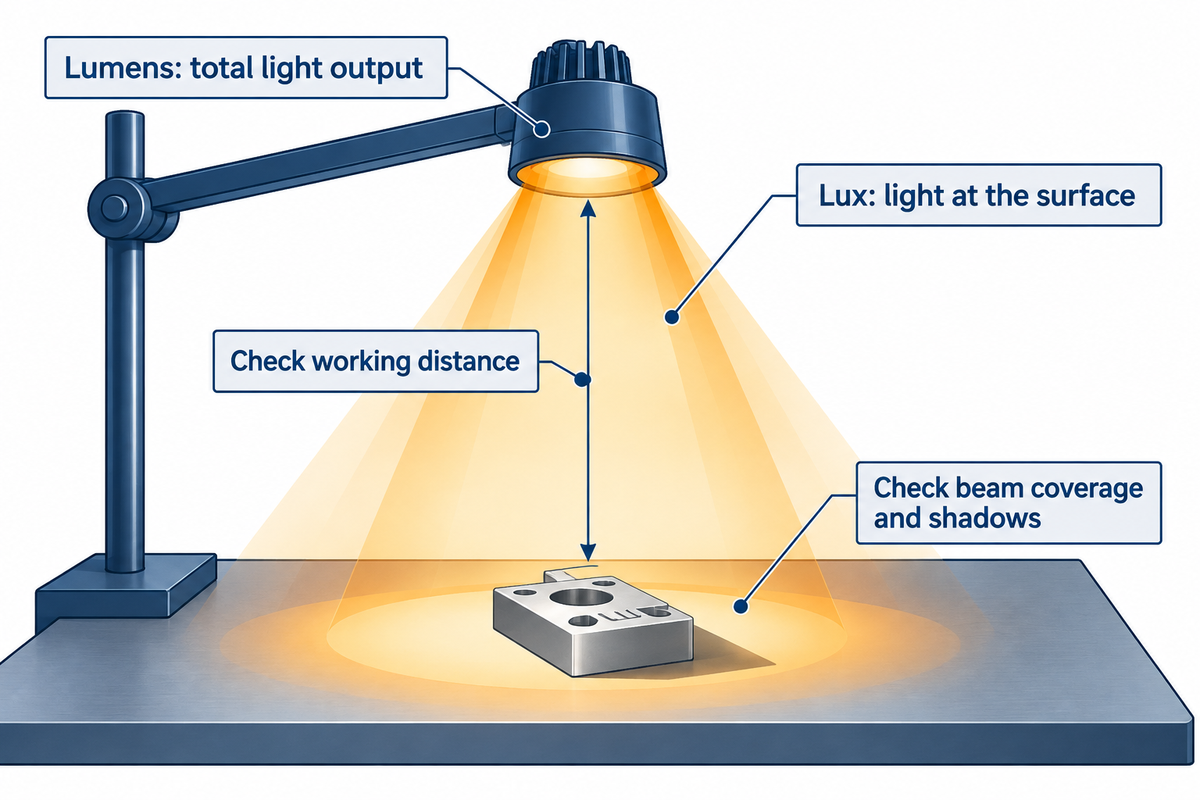
Lumens measure total light output; lux measures illuminance at a surface. Neither a large lumen number nor a bright central spot tells you whether the whole task is visible. Consider the illuminated area, working distance and surrounding shadows when selecting an LED work light with higher light output.
The CCOHS lighting survey considers detail size, contrast, and the time available to see. It also considers surface reflections. Measure at the working surface, in the normal working posture. A reading done on an empty floor misses the vertical labels or recesses that may be of interest.
How many lumens for a good work light?
One cordless work-light buying guide says most cordless work lights fall between 100 and 5,000 lumens and suggests 300 to 700 lumens for indoor detail work when natural light is present; higher-output examples include Makita’s 3,000-lumen DML811 and SCANGRIP’s 10,000-lumen NOVA 10 CONNECT floods. Select output against the task’s lighting requirement and usable coverage at the intended distance. A small recess calls for local light; a broader working zone needs area coverage, with reflections and obstructed detail checked in either case.
SCANGRIP’s NOVA 10 CONNECT page also states a maximum illuminance of 16,000 lux at 0.5 m. The distance belongs with the lux figure. That near-field value doesn’t describe the illumination across an entire room.
For task-level guidance, CCOHS provides 200 to 500 lux for high-contrast or large-scale visual tasks; 500 to 1,000 lux for medium-contrast or small tasks; and 1,000 to 2,000 lux for low-contrast or very small tasks. Use these as examples with your task, site and other constraints, and not as hard U.S. worksite limits.
A technician reviews a 2,000-lumen LED flood with another lamp that also carries the same output label. The task is reading an engraved serial number on a stationary pump, with a pipe partly blocking the light. The first lamp puts a bright patch on the case but leaves the number shaded. Moving the second lamp next to the pipe reveals the number. From the comparison, a placement problem has been identified without proving which lamp is brighter. Repeat from the technician’s working position and check the surrounding fasteners as well. If a meter is used, record its position, distance, and operating mode, alongside the reading.
For mixed units, use the lux and foot-candle converter; a unit conversion still can’t supply a missing beam map.
Color Rendering, Color Temperature and Flicker
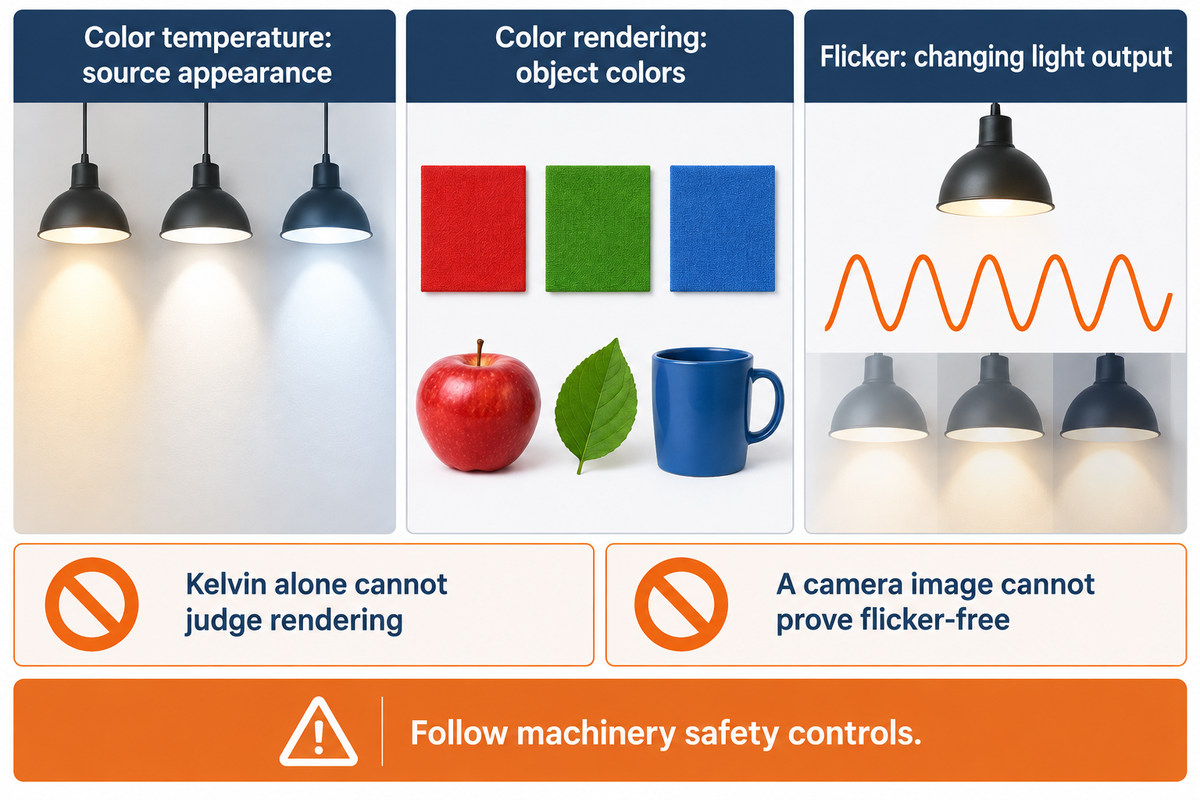
Read color labels and compare color temperature specs, color rendering specs and flicker information individually. Compare these specs when working on colored surfaces, such as painted surfaces, and when working on or near moving machinery. One favorable specification can’t stand in for all three.
“It characterizes the appearance of the emitted light, not the color of illuminated objects.”
A label such as “5000K daylight white” represents a color-temperature category. Discriminating object color also relies on the accuracy of rendering. A selector with 3 color temperatures changes appearance; use the rendering data and reference material to judge each setting.
Is CRI important for work lights?
CRI is important when work involves color discrimination, but the metric and the task also both matter. Determine if the stated CRI value is a general CRI Ra, a sample-specific value, or a manufacturer’s own label. Then compare some of the colored materials with which you’re familiar under the intended setting, rather than choosing by Kelvin alone.
DOE explains that Ra averages eight color samples and excludes the saturated-red sample R9. SCANGRIP defines its CRI+ label as the average of fifteen R-values. Therefore, both CRI+ and Ra figures require their definitions for any comparisons to be made.
For a finish inspection, compare the same reference material under the available settings. Keep other light sources consistent so a change in room lighting does not obscure the comparison. A quality inspector may need different color information from someone locating a plain metal bolt.
PNNL’s 2024 temporal-light-modulation research summary covers different responses to different waveforms and observers. LED lights can produce output modulation even when it is not apparent. A clear phone-camera image doesn’t necessarily mean a lamp is flicker-free. CCOHS explains that flicker can make rotating objects appear slower or even stationary. Follow the site’s machinery controls. Appearing still under light doesn’t necessarily mean a part is actually still.
Choose a Shape That Reaches the Task
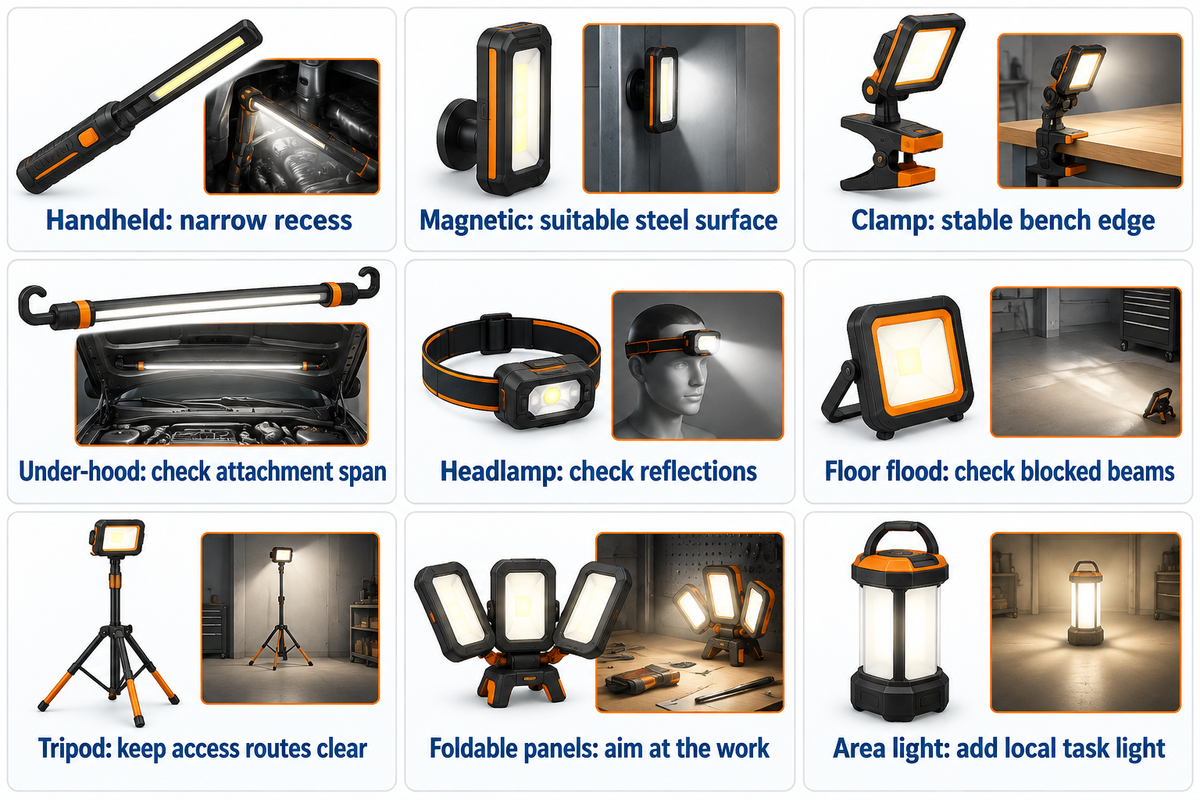
The useful light shape reaches the work without taking up space needed for hands, tools, or movement. Choose a support and beam direction together. An adjustable head may solve a bad sight line more effectively than a larger lamp, while a broad area light may help with movement between tasks.
| Light type | Useful task | Placement decision |
|---|---|---|
| Handheld LED work light or wand | Looking into a narrow recess | Leave access for the tool; use an approved support when both hands are needed. |
| Magnetic work light | Local light beside a steel frame | Match the magnetic base to a suitable surface and the manufacturer’s mounting conditions. |
| Clamp light | Bench-edge task lighting | Check jaw fit and the support’s stability before aiming the beam. |
| Under-hood bar | Automotive work across an engine bay | Check the attachment span and tool clearance on the actual vehicle. |
| Headlamp | A beam that follows the user’s view | Aim away from colleagues’ eyes and check reflections on bright surfaces. |
| Compact floor LED flood light | A nearby wall or low work zone | Check whether equipment blocks the low beam. |
| Tripod work light | An elevated beam across a bay | Place the stand clear of access routes and follow its stability instructions. |
| Foldable panel light | Changing the direction of multiple panels | Aim each panel at the working area rather than the observer. |
| All-direction area light | Movement around a shared work zone | Add local task lighting where people or equipment obstruct the beam. |
This application guide combines CCOHS task-lighting principles with source-derived workshop placement advice. It compares access options rather than rates individual products.
Can I mount it quickly: magnet, hook, tripod, clamp, or stand?
For quick mounting, use the support the work position offers: a magnetic base and hook where there is a suitable steel surface or hanging point, a clamp on a suitable edge, or a tripod or stand where there is floor space for a stable base. Compare mounting options in the actual working position; the one you pick should hold the lamp securely and leave the controls accessible.
For LED work lights with magnetic mounts, a “strong magnet” claim doesn’t stipulate the permitted orientation or load. Follow mounting instructions. For tripod models, ensure that a detachable tripod is included; a foldable tripod also requires its specified setup space. Where the head rotates, check that the selected angle holds; the same also applies to a pivoting head.
Corded, Rechargeable or Dual Power
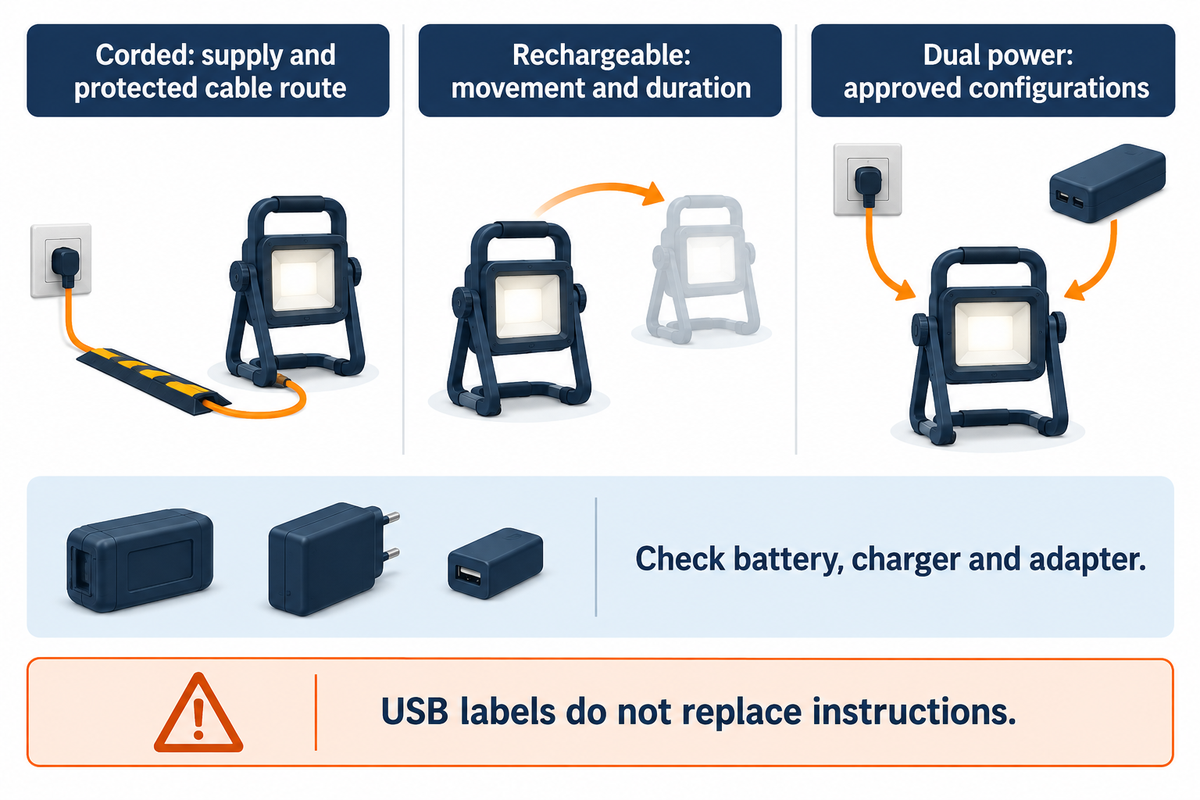
Corded lighting is suitable for a fixed task with an adequate supply and a protected cable route. A rechargeable work light is free to move between various locations unencumbered by a cable. Dual-power models present another option, but permitted batteries, adapters and operating modes are model specific. Select the supply according to the task’s movement and duration.
Makita’s DML811 is a documented example of an 18V LXT battery-or-corded light. Its page includes an AC power cord and lists the battery and charger separately. Don’t assume every cordless work light also accepts mains power, or that a plug-in model can recharge a battery while operating.
A battery platform label identifies a compatible family. A listing like “DEWALT 20V MAX LED work light” requires you to check the exact model and package contents. An 8Ah battery label alone does not give runtime: output mode and the supported pack both matter. For a detailed comparison of energy and charging, see the rechargeable portable work lights guide.
For a USB-C rechargeable LED work light, match the charger and cable specified. USB-A and USB-C descriptions won’t replace the charging instructions. Check the battery indicator, and differentiate the rechargeable battery supplied in the lamp from a “battery included” tool-platform kit.
Reduce Glare and Working Shadows
Useful task lighting keeps the bright source and its reflection out of the critical sightline. Before increasing output, move or redirect the lamp. Fill an obstructed area with a second light from a different direction and control shadows to reveal an edge or surface defect.
CCOHS explains that glare can reduce visibility. Workshop discussions also distinguish soft general light from a movable directional source for close inspection. Not every shadow must be removed: a useful shadow may reveal a raised edge.
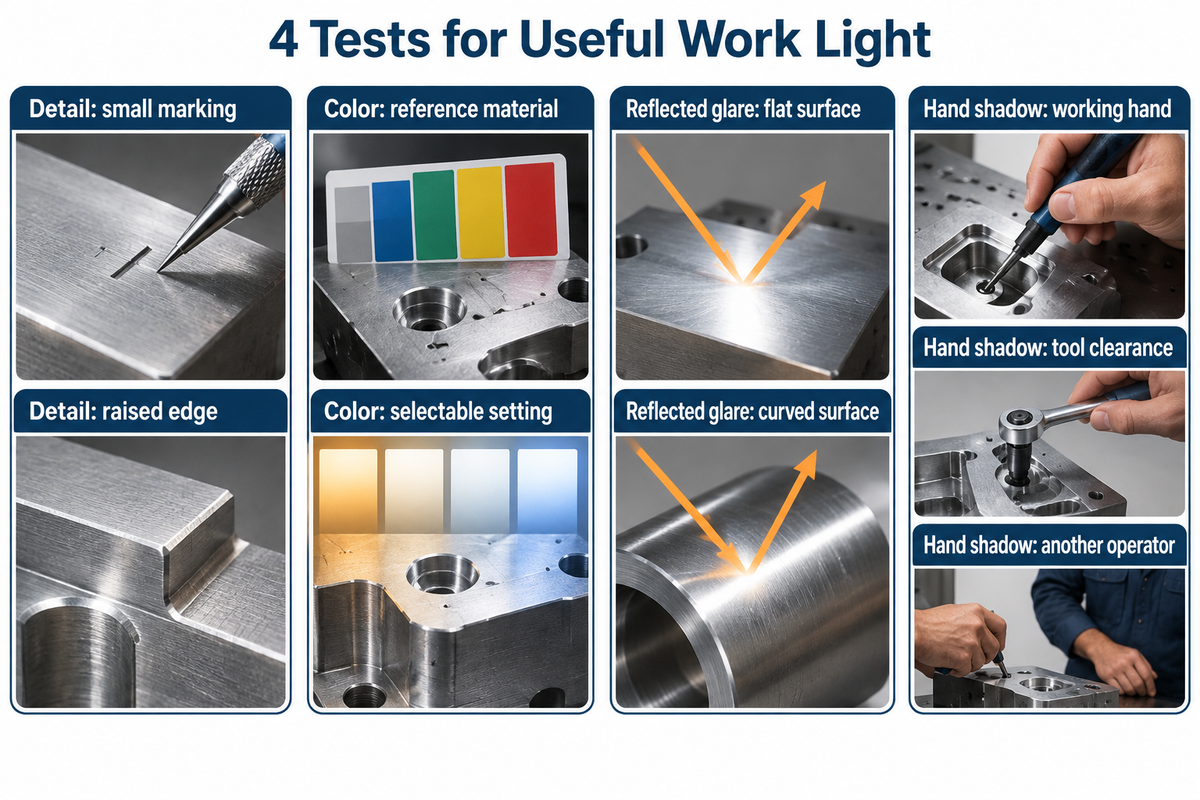
4 Tests for Useful Work Light
4 Tests for Useful Work Light is a practical comparison of detail, color, reflected glare and hand shadow on the same workpiece.
| Check | What to observe | Setup change to compare |
|---|---|---|
| Detail: small marking | Can the actual letters or engraving be distinguished? | Compare distance and beam direction from the same viewing position. |
| Detail: raised edge | Does the edge remain distinct from its background? | Compare directional and diffuse light; retain useful edge shadows. |
| Color: reference material | Can familiar colored materials be told apart? | Keep other room lighting and the reference pieces unchanged. |
| Color: selectable setting | Does the needed color distinction remain visible after changing the setting? | Compare each setting required for the job on the same material. |
| Reflected glare: flat surface | Does a bright reflection wash out a marking? | Move the lamp away from the reflection path or use an approved diffuser. |
| Reflected glare: curved surface | Does the bright patch cross the detail as the viewing position changes? | Check the normal viewing positions before fixing the lamp support. |
| Hand shadow: working hand | Does the hand obscure the light reaching the detail? | Compare a side position or supported second source. |
| Hand shadow: tool clearance | Does the tool block the beam or contact the lamp? | Keep the support outside the tool’s required working space. |
| Hand shadow: another operator | Can the next user reach and see the same task? | Compare the actual users’ postures and adjustment access. |
The comparison is a workplace-lighting exercise, not a certification process. Use a safe representative setup and secure equipment, and complete any required isolation. Involve the actual operators: visual clarity and tolerance of glare vary between people.
Imagine a mechanic inspecting a shiny bracket on an isolated machine. A lamp is reflecting a pale image of itself on a stamped mark. Increasing the brightness makes the reflection stronger, while the mechanic’s hand still shades the fastener behind it. The useful trial is to shift the supported lamp to the side, retain enough general light and compare a small second source near the shaded fastener. Record whether the mark stays readable when the tool is in place. If the edge becomes harder to judge after the addition of diffuse light, retain a directional inspection setting for that step. This would identify an appropriate setup for the task in question, and not verify the lamp for other users.
Consider brightness levels and control access after placement. A rotating head that’s convenient on the bench may be awkward behind a guard. More brightness modes, or an advertised 4 lighting modes, matter only if the useful setting can be selected without disturbing the support.
Read the Ratings and Use the Light Safely
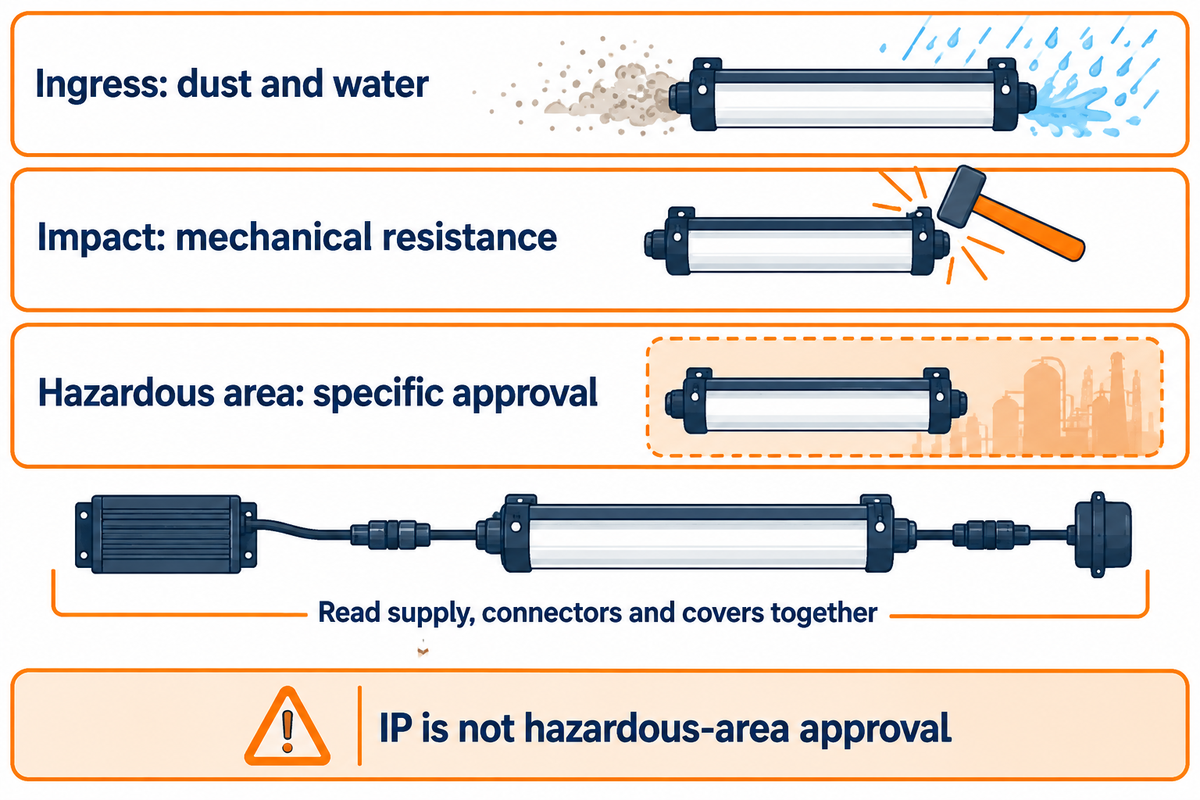
Match the whole lighting assembly to the work environment and the applicable site requirements. Ingress protection concerns dust and water; impact protection concerns mechanical resistance; electrical and hazardous-location approvals address other risks. Read the permitted supply, connectors and covers together. A rating on the housing alone doesn’t settle the choice.
Configuration can change a published rating. SCANGRIP’s MULTIMATCH 3 CONNECT description distinguishes IP30 with a connector and battery, IP54 with its optional cover, and IP65 with the power supply. The lesson for any purchase is to determine the configuration behind the published number, and especially the charging arrangement.
Standards have different scopes. The current public UL 153 scope includes Supplement SA battery luminaires, while separately directing work lights and portable hand lights with battery packs to UL 1576. A model’s documented evaluation and intended use matter more than a generic “certified” description.
For a U.S. construction job, OSHA’s temporary-lighting rules address protected lamps, suspension and hard- or extra-hard-service lighting cords. In wet or conductive locations, that provision specifies portable lighting at 12 volts or less, or 120-volt lighting protected by a ground-fault circuit interrupter. This is a construction-specific rule, not a universal voltage rule for all work environments. An outdoor job site still needs equipment and connections suitable for its actual conditions.
Where flammable vapors or combustible dust may be present, use the site’s hazardous-area assessment and suitable equipment. OSHA’s classified-location requirements address the actual classification and ignitable material. An IP rating doesn’t provide that approval. The separate portable explosion-proof lighting range is the relevant starting point for a model-specific discussion.
Before setting up jobsite lights, check the support, supply route and required operating limits. Use approved accessories and charging equipment, and leave electrical installation or fault testing to qualified personnel.
Cleaning and Troubleshooting
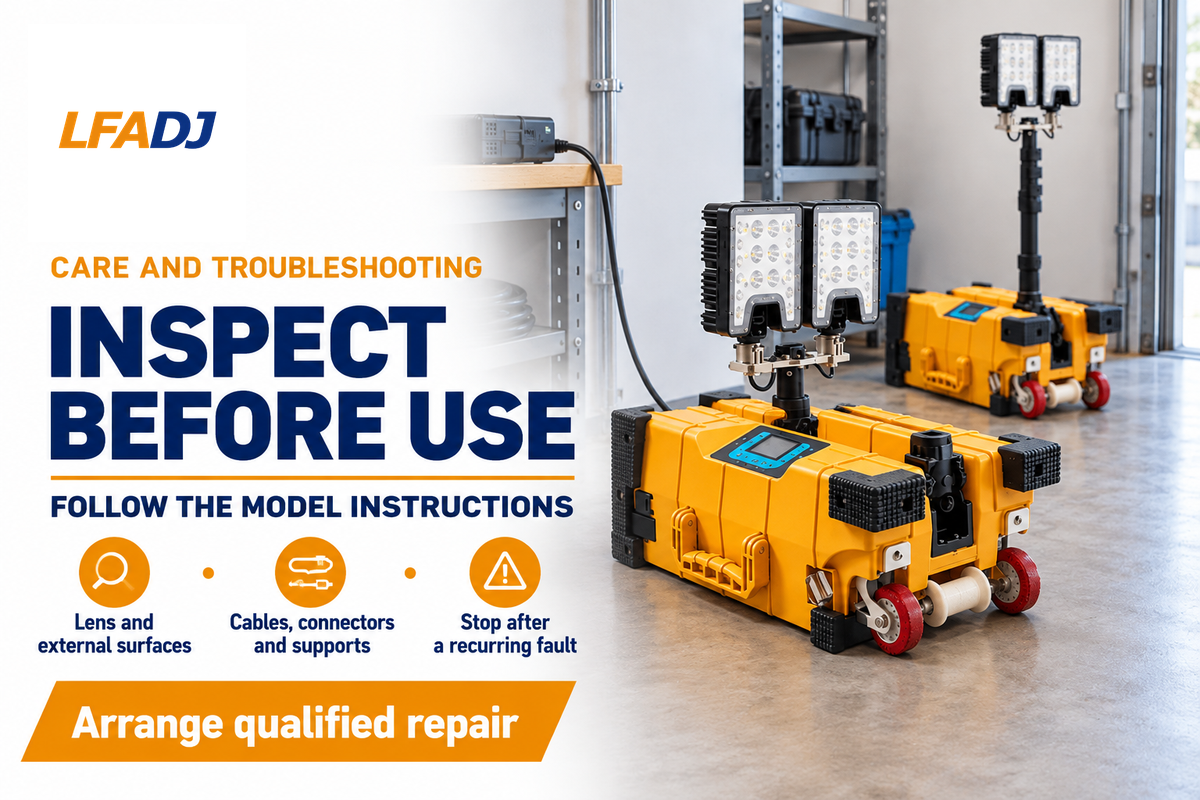
Clean the lens and external surfaces following the manufacturer’s instructions, and inspect the lamp, support and supply before use. Reduced light may come from a dirty lens or a different selected mode. If there’s visible damage or a recurring electrical fault, the lamp shouldn’t be used and should be sent for repair.
Some OSHA Portable Equipment rules require equipment checks and removal of items that endanger a user and/or others, and prohibit repetitive reclosing of protective devices after faults. Cleaning the lens doesn’t resolve an electrical problem.
Do
- Switch off and disconnect as instructed before cleaning.
- Inspect external cables, connectors and supports.
- Use the specified battery and charging equipment.
Don’t
- Keep resetting a recurring electrical fault.
- Open a sealed assembly without an authorized service procedure.
- Carry or suspend a lamp by an unsuitable power cord.
Compare Complete Kits Before You Buy

Useful comparisons of lamp kits can include the power components, the support and the service. Define the job and compare offerings for the same task. A low lamp-only price may leave a battery, charger, adapter or stand to buy separately, while a higher offer may already include the parts you need.
The NIST equipment pre-purchase guide treats ancillary purchases and anticipated maintenance needs as separate questions. A portable worklight gives you an opportunity to identify the approved components and replacement parts, and to ensure warranty terms are as described, before comparing prices.
Let’s say a service bench is being equipped for occasional vehicle repairs, and a buyer is evaluating lamp offers that include a body only, or body, battery and charger, and is then comparing prices. The buyer already owns a battery platform, but this doesn’t mean the first lamp can support those batteries. Comparing the two headline prices would leave different jobs unfinished. A better comparison includes all approved power components and support for the task, as well as components already available on site. The technician then checks access to the controls, while the buyer confirms which replacement parts and service terms are actually included.
For LFADJ product configurations, visit the Portable LED Work Lights solution page. Include the task, working distance, surface to which the attachment is to be made, the supply, and the environment when you submit mounting and power details.
Industry Outlook: Clearer Work-Light Test Claims
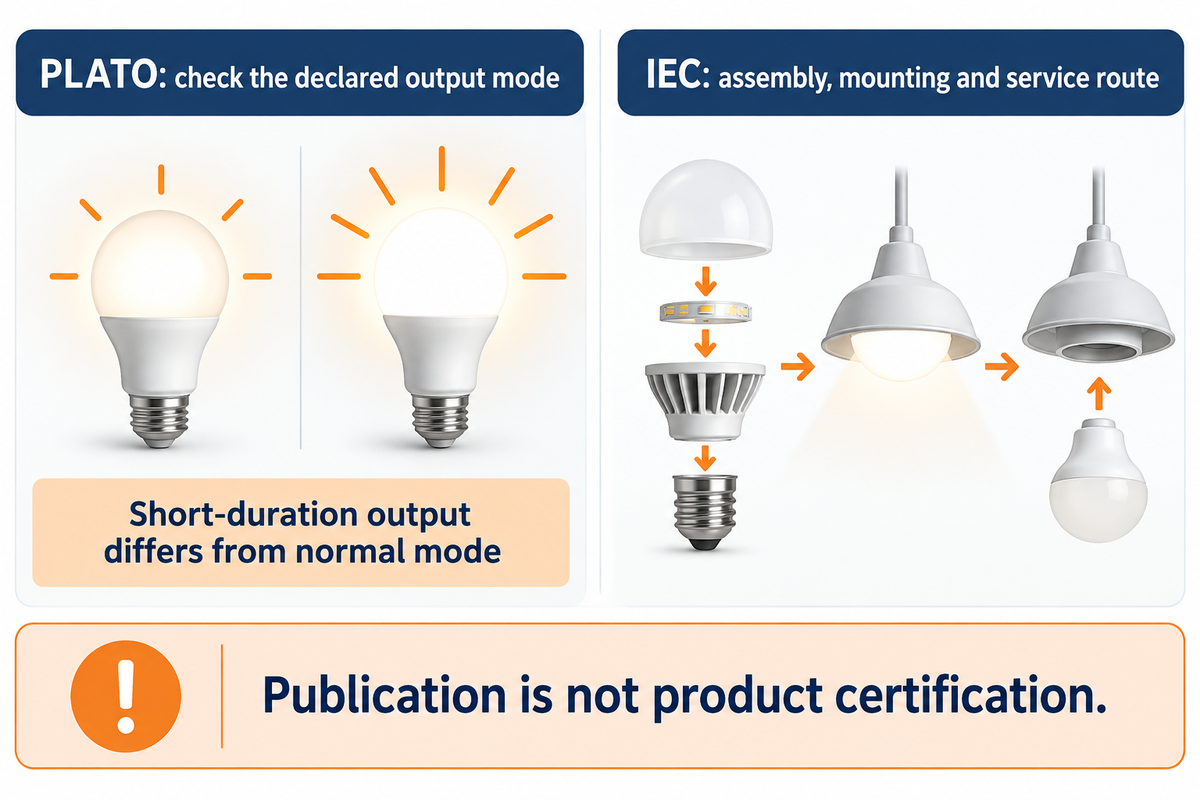
There are test labels that change what buyers can compare, especially when a headline brightness figure represents a short-duration mode. The purchasing question becomes what method/operation/configuration produced the claim. Check those details when replacing a familiar lamp rather than assuming a newer label describes equivalent performance.
In the February 2026 announcement of ANSI/PLATO FL 1-2025, PLATO described a new method for short-duration elevated brightness, known as turbo or boost. It also extended its scope to include area lights, headlamps and other portable lights, and revised its test methods for dust and durability.
For the buyer, the difference is practical: a short-term increased output and the normal working mode address different questions. Keep the declared mode with each lumen output and runtime figure; the revised standard also adds a stopwatch-style FL1 icon that identifies turbo brightness performance. The presence of a high peak number alone doesn’t explain the light available during the course of a maintenance task. The publication of a revised standard doesn’t certify that a particular model was tested to that standard.
The IEC 60598-1:2024 public revision summary identifies a new battery-luminaire annex and changes concerning the magnetic suspension and serviceable components. These developments make the complete assembly, attachment method and repair route worth checking alongside optical performance.
When changing the lamps in a garage or jobsite kit, keep the useful setup information, i.e. the task, normal viewing position, support and the brightness setting. Compare the replacement against that job, then review its current instructions and documented evaluation. A technician needs sufficient light; an inspector needs visible detail and color information; a buyer needs a complete, supported configuration.
Key takeaway
Choose the lamp and setup that keep the task visible with hands and tools in place, then compare the stated test mode, complete power arrangement and required supports.
Frequently Asked Questions
What is the best portable LED work light?
Pick by task: a handheld or supported inspection lamp for a recess or small marking, a supported flood light for a work zone, and an area light for moving around a shared workspace.
Start with the information that must always remain visible, with your hands and tools in place. Compare a supported inspection lamp with an area flood on the same representative part. Keep the working distance and viewing position alike, then assess reflections, color discrimination and access to the mounting controls and switches.
Can portable LED work lights be used outside?
Outdoor use is suitable when the complete assembly and its instructions cover the actual conditions.
Read the environmental rating for the lamp, its supply, connectors and any required covers. Keep operating and charging conditions separate. Water resistance does not establish immersion resistance or approval for flammable atmospheres. For outdoor work, also check the support, cable route, temperature limits and the site’s applicable electrical requirements before setup.
Can portable LED work lights be repaired?
Repair is possible where the model provides an authorized service route or user-replaceable parts.
Check the service instructions before replacing a battery, charger, stand, or lighting assembly. Remove damaged equipment from use and arrange the specified repair or replacement. Ask which parts remain available and what the agreed warranty covers, including who performs the work and the agreed service response time, warranty period and onsite support scope.
Can I hold the work light in my hand?
Handheld use is suitable for a model designed and instructed for that purpose.
For a task needing both hands, choose an approved support instead. Keep the lens in your periphery and ensure that required ventilation is unobstructed. Check that a handheld lamp can reach the detail without obstructing the tool or your view.
Why did my LED work light stop working?
Start with a discharged battery, a missing supply, a changed mode or a protection shutdown, then stop using it if damage or a recurring fault appears.
Check the manufacturer’s instructions for the selected mode, available supply and indicated battery charge. Protection functions differ between models, so a shutdown alone does not identify the cause. Do not repeatedly reset a fault or substitute an improvised charger. If the battery or equipment is damaged, do not use it and contact the appropriate person for repair. A dirty lens can explain reduced output, but cleaning it does not repair an electrical fault or make damaged equipment safe.
Can I use a portable work light during a home power outage?
A charged battery-powered model can provide temporary light within its operating limits.
A mains-only lamp relies on a suitable, reliable, live supply. Keep a different means of safe exit lighting; task lighting does not necessarily meet the requirements of emergency lighting. The portable emergency-lighting guide states the different requirements when preparing for loss of normal power.
What type of work light works best for under-hood automotive repairs?
A supported inspection lamp or under-hood bar helps illuminate components while leaving both hands available.
Check the actual attachment surfaces, clearances and reflections from bright metal. A magnetic base needs a magnetic surface; a clamp must fit its intended support. Compare the light with tools in their normal positions and the vehicle secured as required for the task. A second, low output source may fill an obstructed area better than increasing the output of the first source. Portability is useful, but the lamp must be stable during the inspection of other components.
MATCH THE LIGHT TO THE WORK. LFADJ provides mobile, industrial and emergency lighting. Discuss with us your site and task conditions to determine a suitable configuration.
Related Articles
- Rechargeable portable work lights: power and charging
- Portable emergency lights guide
- Portable explosion-proof lighting guide
- Mobile lighting systems guide
References & Sources
- CCOHS: Lighting Ergonomics, Survey and Solutions
- U.S. Department of Energy: LED Color Characteristics
- PNNL: Understanding Temporal Light Modulation
- CCOHS: Aging Workers, vision and task lighting
- PLATO: Announcement of the revised FL 1-2025 standard
- CCOHS: General lighting principles
- UL Standards: Public scope of UL 153
- OSHA: Construction temporary-lighting requirements
- OSHA: Hazardous classified locations
- OSHA: Use of portable electrical equipment
- NIST: Equipment pre-purchase guide
- IEC 60598-1:2024: Public scope and revision summary
- CCOHS: Light flicker and apparent motion